Showing posts with label PLANT LOVE. Show all posts

6.5.17

My heart in a jar... from our planted under glass terrarium collection.


Taking the time to see the extraordinary beauty
in the tiniest of things.


Paper Meadows Photography Blog-Plant love-Mini Terrarium-Plants under glass.


This is one of my favorite terrariums.

There is something to be felt when looking at a planted world under glass.
The earthy miniature scene all contained under a clear viewing window for us to gaze inside to seems to provide us with a mood of calm and peace. But, only if you take the time to explore the beauty in the tiniest of things around you.
♥
Created from a little aged white dish for the soil and sweet little plant to rest in, and an old glass vase from the goodwill store which I used as a cloche.


Cloche; I love that word. 

A cloche is a bell or rounded dome shape cover usually made from glass or plastic. It is often used to cover and protect small outdoor plants from frost, or as a tableware cloche used to cover food items.


We create many of our cloches out of old glass vases, recycled jars, and glass dishware. We simply turn the glassware upside down and voila! You have a a plant terrarium, or plant under glass, as I like to call them!


Paper Meadows Photography Blog-Plant love-Mini Terrarium-Plants under glass.

 ☙ I call it my heart in a jar. ❧

With hope, I rested the glass vase over top of a little cutting of a Wood Violet - Viola riviniana 'Purpurea'. 

I loved how the leaves resembled little hearts.

I wasn't confident this sweet little plant was going to thrive, or even survive, but it has.
It's been perfect due to a healthy growing environment;
with a layer of little rocks or pea gravel for drainage,
a layer of some activated charcoal for added drainage, nutrients, clean air and freshness,
and a healthy topping of a good potting soil.

As it is a closed in environment, and having this sweet little terrarium placed in a lightly lit window, the need for watering has been minimal, and has almost become a self sustaining environment. Usually dew drops will form on the inside of the glass in the morning light and heat proving just enough moisture; if not I just give the Viola a little drink of water when needed.

It's been living well for about many months now.
With no new growth or leaves it has created the perfect little heart under glass, and became a beautiful mini terrarium to photograph.

UPDATE: The little Wood Viola was in a resting phase during the winter months, but in Spring has woken up with new growth daily.

I'll post an updated picture soon, as it it is no longer one heart, but many!


Paper Meadows Photography Blog-Plant love-Mini Terrarium-Plants under glass.


I added some sweetness to the original image.
I duplicated the leaf at a larger size and then lightly colored one of heart the heart leaves a soft pink in Photoshop Elements.

...and then I couldn't resist coloring both!
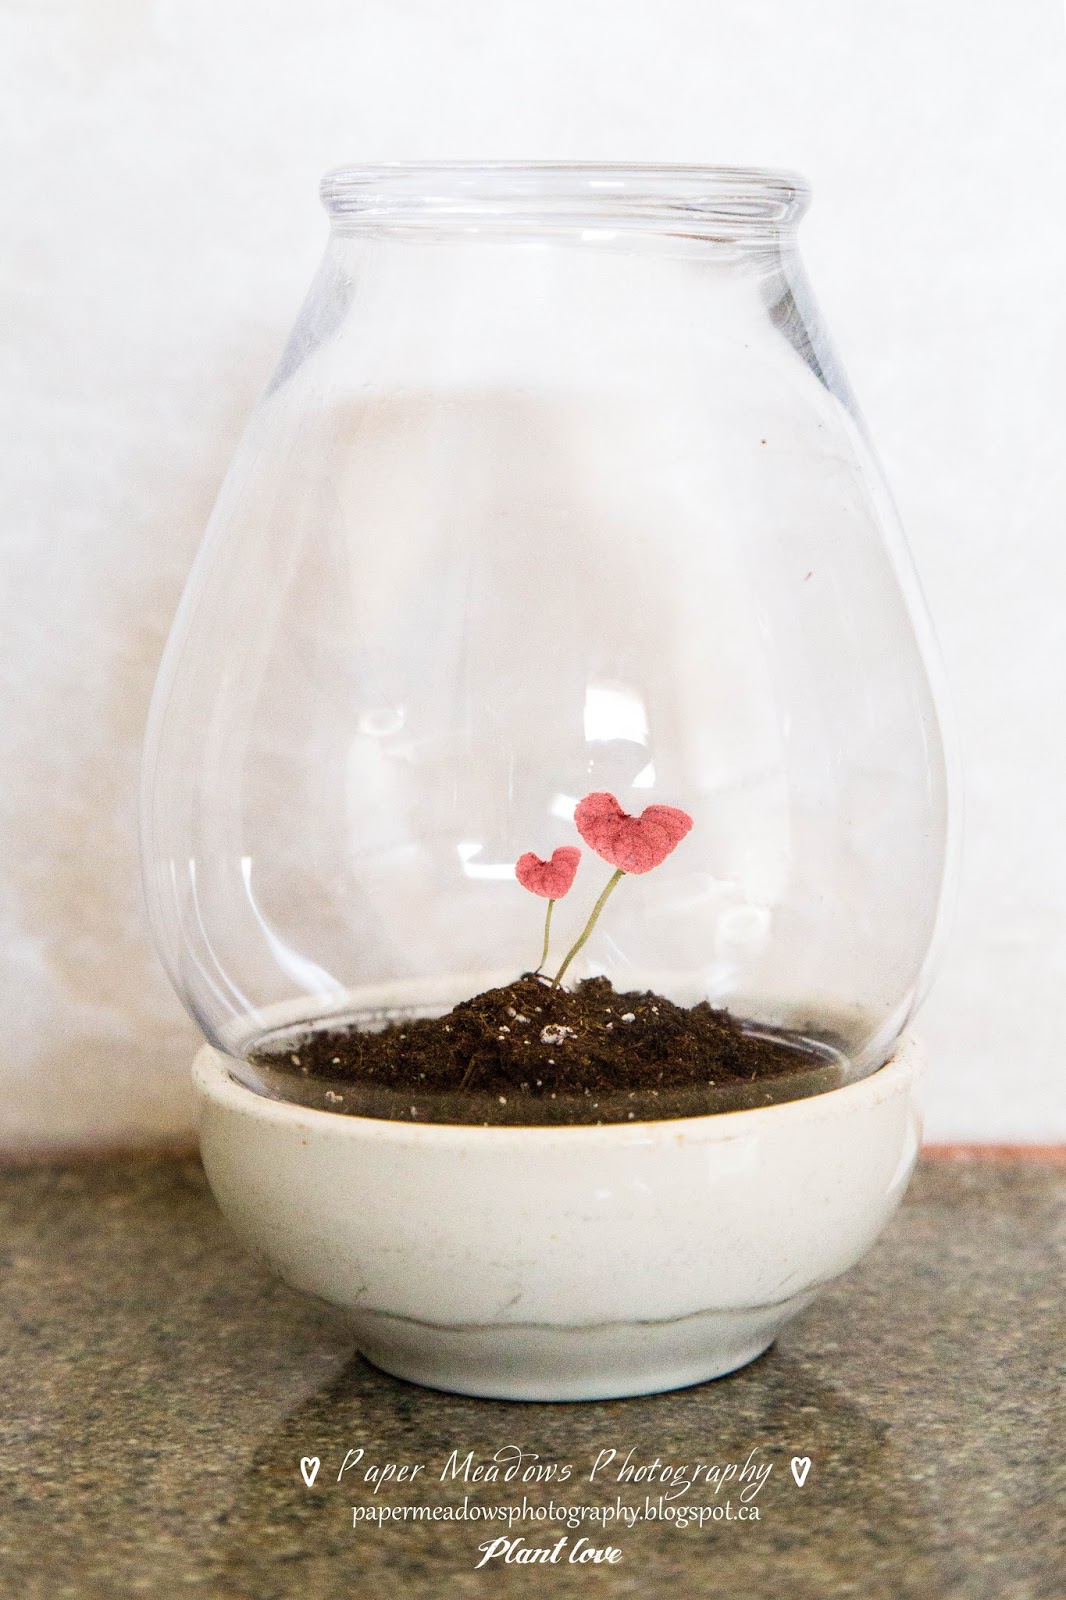

Paper Meadows Photography Blog-Plant love-Mini Terrarium-Plants under glass.


The smallest things can make my heart smile.


Paper Meadows Photography Blog-Plant love-Mini Terrarium-Plants under glass.


Hope you find the perfect little cloche for your mini terrarium!
Paper Meadows Photography Blog-Free printables


Paper Meadows Photography Blog-Plant love-Pin and tweet us!

Paper Meadows Photography Blog-Plant love-Mini Terrarium-Plants under glass.


5.5.17

A DIY rustic weathered faux barn wood shelf on casters!


A Mother & Daughter DIY summer project
creating
the perfect spot to display plants and our earthy terrariums.


Paper Meadows Photography Blog-DIY rustic wood shelf for plants and terrariums


Last summer my daughter and I created this rustic faux barn wood shelf on caster wheels. We kind of built it, as we went along!

The shelves were each made up of
about 10 flat brackets, 
six ~1.5 X 7 inch lumber pieces,
six 12 inch silver galvanized pipes,
12 silver metal floor flanges,
six 3 inch metal casters,
and many, many, small screws.

We also had on hand,
an orbital sander and sand paper,
cheap paint brushes,
a drill,
dry cloth or rag,
three paint colors,
and clear varnish.

I think that's it... 

All of our supplies were purchased at Rona;
it was fast and easy to get started,
as everything we needed  for our Do It Yourself wooden shelf project was available to purchase all at one store.

Here are some quick steps to give you an idea of
how we created this wood shelf!
(Wish I had pictures; sorry.)

1.
Using the flat brackets we secured 3 pieces of lumber
to create one shelf.
By lining up the lumber on the ground; doesn't need to be perfect-tight together, as long as your ends meet up that's great.
I used short screws to attach the flat brackets on, so they wouldn't come through the top of the wood.
Use as many flat brackets, spaced apart, as you need until the shelf feels solid-stable.
( I think we may have added more then 5 on each.)

Repeat for second shelf. You won't really see the brackets,
as this will be the bottom of your shelves. The top shelf brackets might be seen when you are on the floor, but not likely.

2.
Now, we sanded all the wood on each of the shelves;
top, bottom, edges, etc. using an orbital sander.
The sanding a this point was just to get some of the more rougher wood smoothed out, creating more of a level surface for a shelf, and so we don't get slivers!
I also rounded and shaped the ends of some of the wood to add a softened, weathered feel.

3.
After you are happy with your sanding,
wipe the wood down with a dry cloth to remove any dirt and sawdust.

4.
We used whatever old paint brushes we had around the house to apply our layers of paint.
It was lightly painted on the top and bottom, edges, and ends of all the boards with three different colored paints;
Charcoal Grey, Beige and White.
(It's what paint we had on hand.)

We wanted a distressed look.
So we starting with the darkest color first;
the Charcoal Grey paint,
then Beige,
and finally White.

Each color of paint was applied and then allowed to dry before adding the next color. You don't want your colors to mix when they are still wet, and become to much of a 'muddy' color.

We applied the paint with a dry brush; meaning very little paint on the brushes. We just wanted subtle color put on the boards;
just as if the boards had been peeling and left out in the rain for twenty years.
Less paint applied will help to give it a look of different layers of paint that have been distressed over time.

We did not cover the whole board with each color, but painted each color on here and there, some colors overlapping.
We even left some space on the boards unpainted.

 Our painting of each color was an uneven, wispy,
kind of a 'go for it' painting style;
we kept painting until we created the rustic look we wanted.

5.
After the paint dried for a couple of days,
we lightened up and aged the paint layers with some gentle sanding using the orbital sander, with a fine sand paper.
 Then we protected the painted boards with two coats of clear varnish.

6.
After the varnish was good and dry,
we screwed on the caster wheels on the bottom shelf with short screws. Measuring and placing each wheel the same length apart.

7.
The last step was screwing on the silver metal floor flanges.
One set of 6 flanges were screwed on top of the bottom shelf,
and the other set of 6 flanges were screwed on the bottom of the top shelf. (again using short screws)
We decided to place our flanges right in corners, and a set right in the middle.

 Take care when attaching the flanges, that they are measured and placed the same distances apart on the bottom shelf and on the top shelf,
so the silver galvanized pipes will line up easily when it comes time to screw each of them into a set of the flanges.

Ta-Da!
 Now all you have to do is fill it with plant love!


Paper Meadows Photography Blog-DIY rustic wood shelf for plants and terrariums


Over all, we weren't too perfect because really all we wanted was a rustic weathered faux barn wood look.

It holds up well to water droplets and spills etc. because of the protection the coats of varnish provide,
so I think this shelf will last forever!


Paper Meadows Photography Blog-DIY rustic wood shelf for plants and terrariums


We loved the finished results.
It has become the perfect place for
some peaceful zen moments.

Lovely!


Have a happy DIY day!

Paper Meadows Photography Blog-DIY WOOD SHELF


Paper Meadows Photography Blog-Share us... Pin or tweet us!
Paper Meadows Photography Blog-DIY rustic wood shelf for plants and terrariums


28.4.17

Plant Love. Little fawn, little tree.


Little fawn, little tree.


Paper Meadows Photography Blog-Plant Love- Little Fawn, little Tree-mini fairy garden


This is one of our mini-mini fairy gardens; little fawn, little tree.

Her bed is made up of a soft clump of Club Moss, and her shaded shelter comes from a Dwarf Pine.
The white kitchen dishware is recycled into a lovely plant pot; which we purchased from one of our local second hand shops.

Her neighbors are full of beauty.
On one side is little rabbit, who rests beside his tropical Pepperomia plant,
while he gazes out the window from his little white creamer dish.
On the other side of little fawn sits a white recycled teapot full of precious pink Violets.
They all are displayed upon a window shelf in the kitchen, with many other white kitchen wares turned plant pots.
We will share more soon.


We have collected many little dishes, pots, and glassware found treasure hunting at our local flea market,
and second hand stores. We love recycling these little dishes into plant pots as a whimsical way to display some of
our favorite little plants, and are the perfect size for our window plant shelf.


Happy Planting!


Paper Meadows Photography Blog-Pin and tweet us.


Paper Meadows Photography Blog-Plant Love- Little Fawn, little Tree-mini fairy garden